Introduction
Apache Tomcat is a web server and servlet container that is used to serve Java applications. Tomcat is an open source implementation of the Java Servlet and JavaServer Pages technologies, released by the Apache Software Foundation.
This tutorial covers the basic installation and some configuration of Tomcat 7 with yum on your CentOS 7 server. Please note that this will install the latest release of Tomcat that is in the official Ubuntu repositories, which may or may not be the latest release of Tomcat. If you want to guarantee that you are installing the latest version of Tomcat, you can always download the latest binary distribution.
Note: Tomcat can be installed automatically on your Droplet by adding this script to its User Data when launching it. Check out this tutorial to learn more about Droplet User Data.
Prerequisites
Before you begin with this guide, you should have a separate, non-root user account set up on your server. You can learn how to do this by completing the initial server setup for CentOS 7 tutorial. We will be using the demo user for the rest of this tutorial.
Install Tomcat
Now you are ready to install Tomcat 7. Run the following command to install the Tomcat package:
Answer y at the confirmation prompt to install tomcat. This will install Tomcat 7 and its dependencies, such as Java, and it will also create the tomcat user.
Most of the important Tomcat files will be located in /usr/share/tomcat. If you already have a Tomcat application that you want to run, you can place it in the /usr/share/tomcat/webapps directory, configure Tomcat, and restart the Tomcat service. In this tutorial, however, we will install a few additional packages that will help you manage your Tomcat applications and virtual hosts.
Let's make a quick change to the Java options that Tomcat uses when it starts. Open the Tomcat configuration file:
- sudo vi /usr/share/tomcat/conf/tomcat.conf
Add the following JAVA_OPTS line to the file. Feel free to change the Xmx and MaxPermSize values—these settings affect how much memory Tomcat will use:
/etc/default/tomcat7 — JAVA_OPTS
JAVA_OPTS="-Djava.security.egd=file:/dev/./urandom -Djava.awt.headless=true -Xmx512m -XX:MaxPermSize=256m -XX:+UseConcMarkSweepGC"
Save and exit.
Note that the Tomcat service will not be running yet.
Install Admin Packages
If you are just getting started with Apache Tomcat, you will most likely want to install some admin tools that will help you deploy your Java applications and manage your virtual hosts. Luckily, there are packages that include these tools as web applications.
To install the default Tomcat root page (tomcat-webapps), and the Tomcat Web Application Manager and Virtual Host Manager (tomcat-admin-webapps), run this command:
- sudo yum install tomcat-webapps tomcat-admin-webapps
Answer y at the confirmation prompt.
This adds the ROOT, examples, sample, manager, and host-manager web apps to the tomcat/webapps directory.
Install Online Documentation (Optional)
If you want to install the Tomcat documentation, so that all of the links on the default Tomcat page will work, run this command:
- sudo yum install tomcat-docs-webapp tomcat-javadoc
Answer y at the prompt to install the documentation packages.
In order to use the manager webapp installed in the previous step, we must add a login to our Tomcat server. We will do this by editing the tomcat-users.xml file:
- sudo vi /usr/share/tomcat/conf/tomcat-users.xml
This file is filled with comments which describe how to configure the file. You may want to delete all the comments between the following lines, or you may leave them if you want to reference the examples:
tomcat-users.xml excerpt
<tomcat-users>
...
</tomcat-users>
You will want to add a user who can access the manager-gui and admin-gui (the management interface that we installed earlier). You can do so by defining a user similar to the example below. Be sure to change the username and password to something secure:
tomcat-users.xml — Admin User
<tomcat-users>
    <user username="admin" password="password" roles="manager-gui,admin-gui"/>
</tomcat-users>
Save and exit the tomcat-users.xml file.
Now we're ready to start the Tomcat service.
Start Tomcat
To put our changes into effect, restart the Tomcat service:
- sudo systemctl start tomcat
If you started the service earlier for some reason, run the restart command instead:
- sudo systemctl restart tomcat
Enable Tomcat Service
If you want Tomcat to run every time the server is booted up, you will need to enable the service:
- sudo systemctl enable tomcat
Now we're ready to access the web interface.
Access the Web Interface
Now that Tomcat is up and running, let's access the web management interface in a web browser. You can do this by accessing the public IP address of the server, on port 8080:
Open in web browser:
http://server_IP_address:8080
You will see something like the following image:
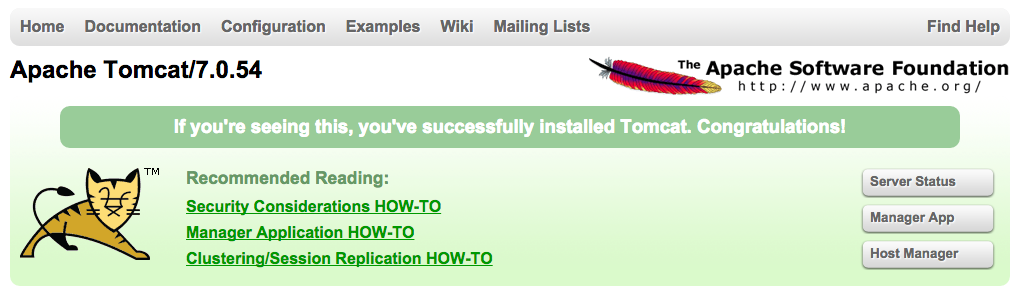
As you can see, there are links to the admin webapps that you installed earlier.
Let's take a look at the Manager App, accessible via the link or http://server_IP_address:8080/manager/html:
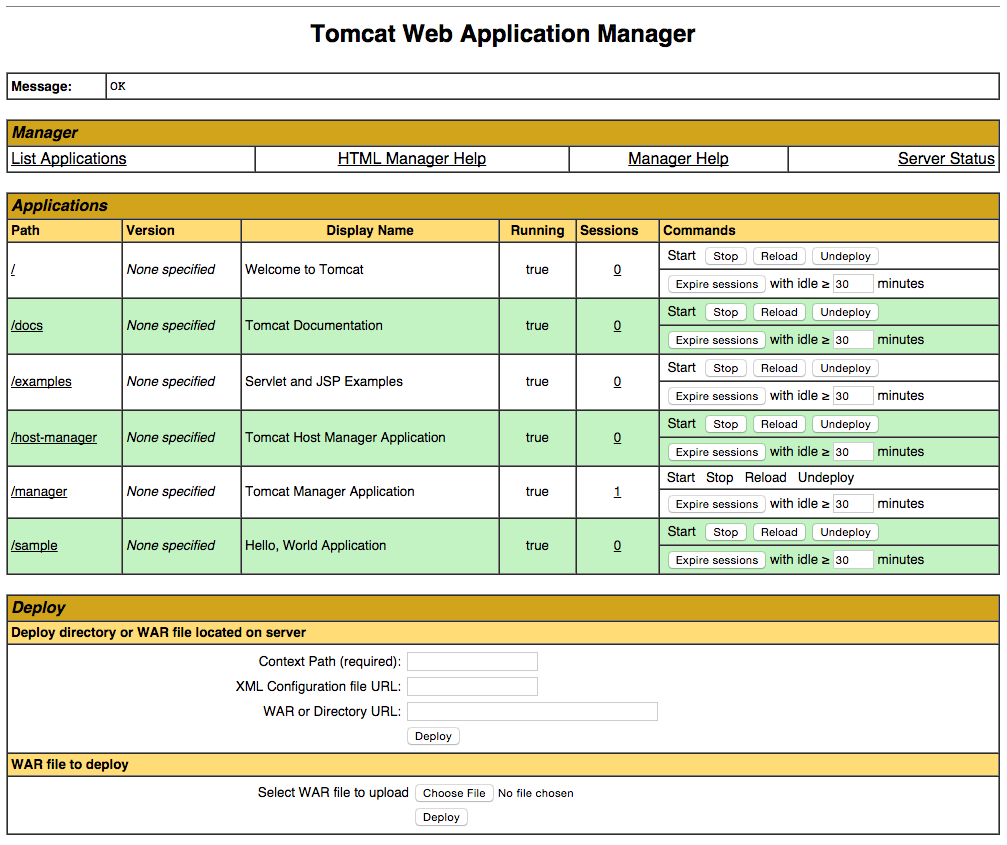
The Web Application Manager is used to manage your Java applications. You can Start, Stop, Reload, Deploy, and Undeploy here. You can also run some diagnostics on your apps (i.e. find memory leaks). Lastly, information about your server is available at the very bottom of this page.
Now let's take a look at the Host Manager, accessible via the link or http://server_IP_address:8080/host-manager/html/:
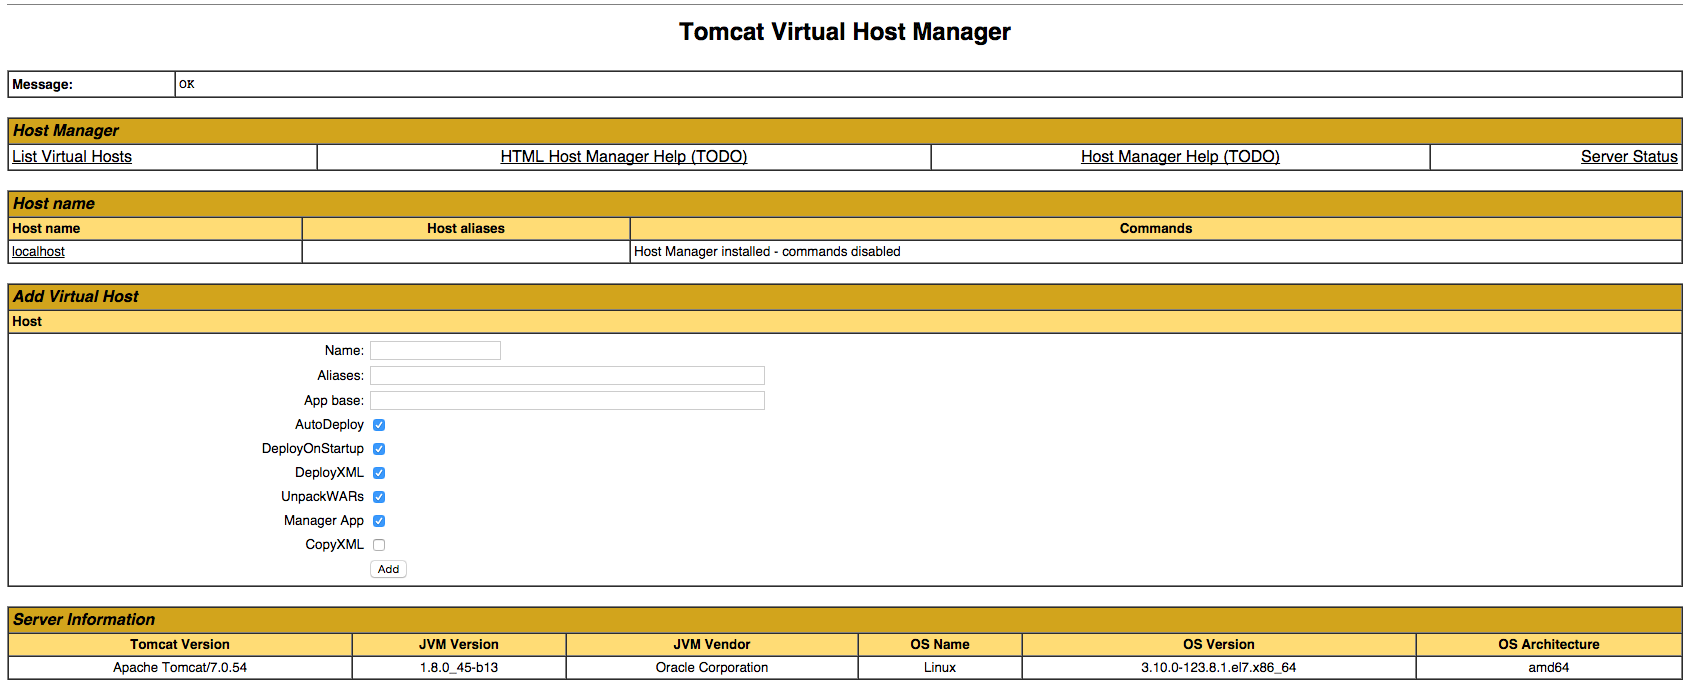
From the Virtual Host Manager page, you can add virtual hosts to serve your applications from.
Conclusion
Your installation of Tomcat is complete! Your are now free to deploy your own Java web applications!


